
Customizing Magento 2 Admin Grid Using UI Components and Data Providers
Learn how to customize Magento 2 admin grids using UI components. This guide covers module creation, menu config, ACL, and custom data providers
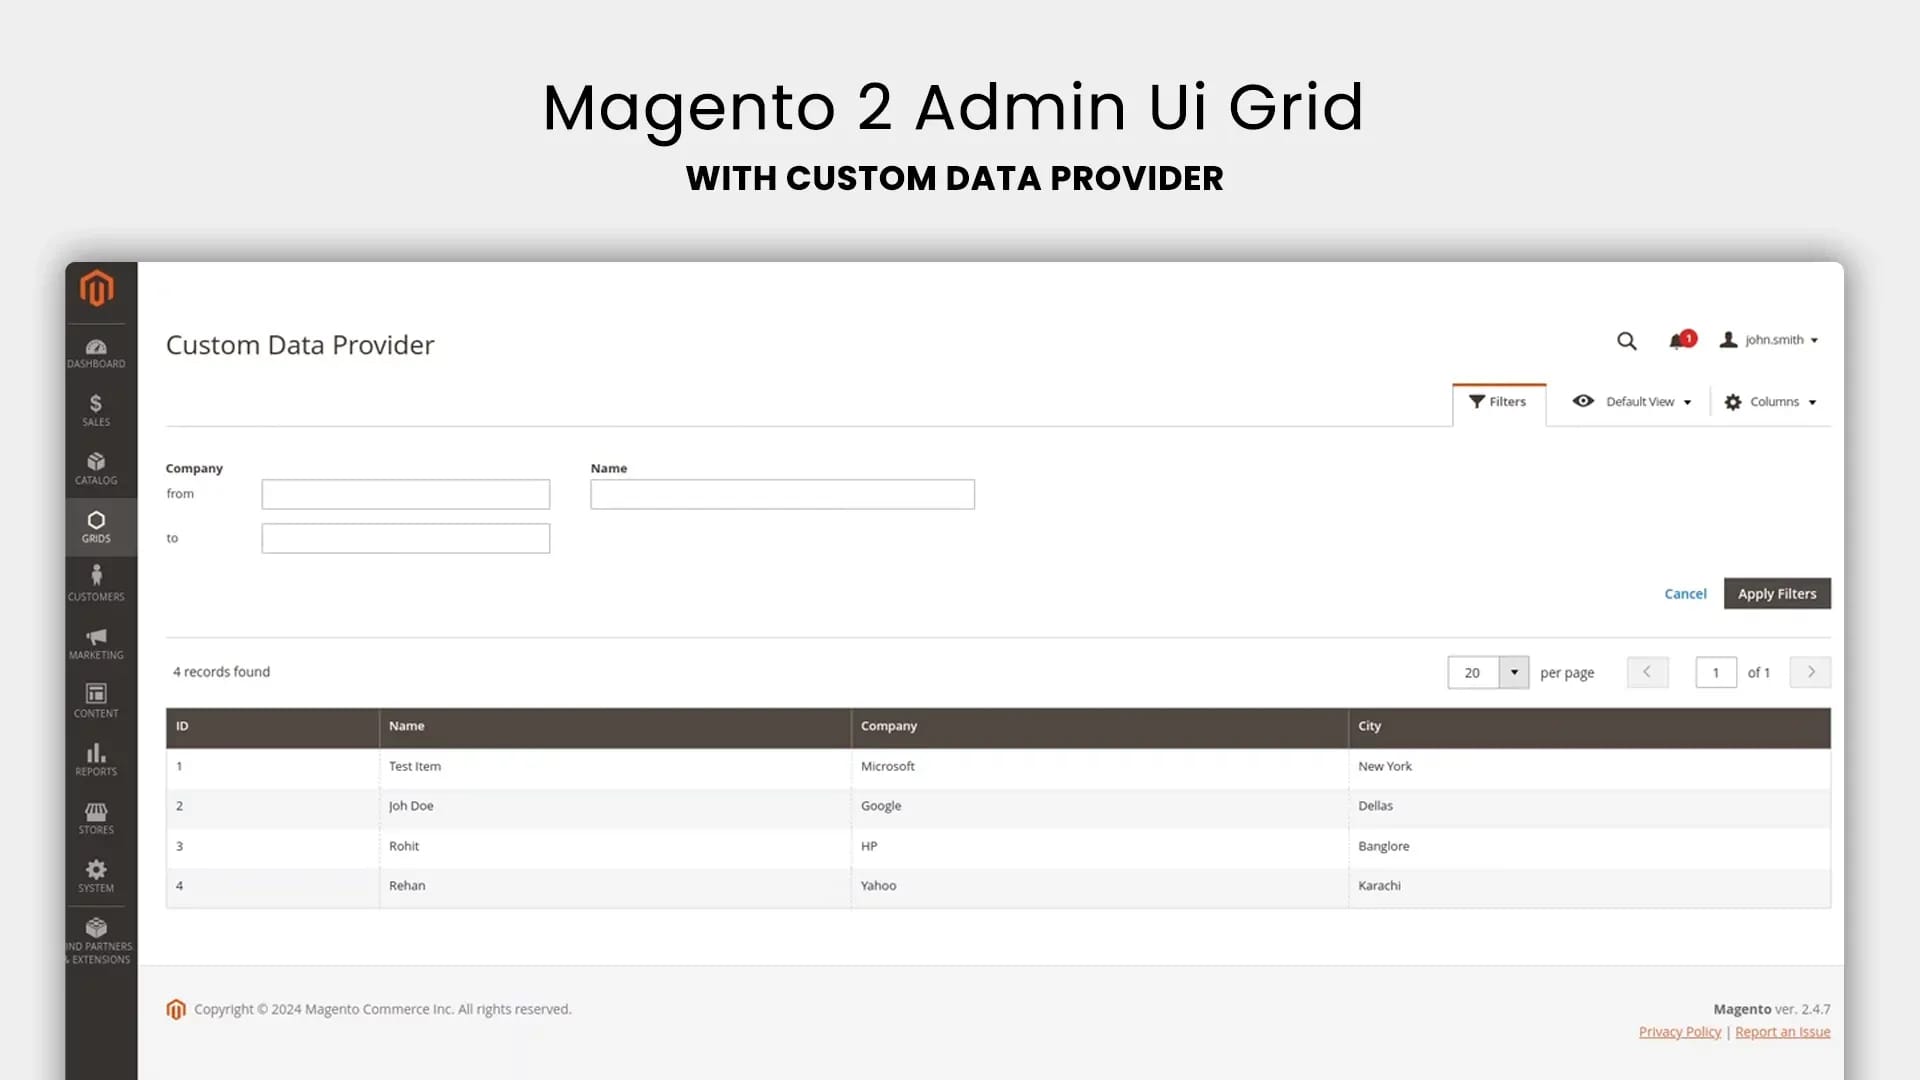
In this series of tutorials, we will be discussing how to customize Magento 2 admin grids using UI components. We will cover some conventional and non-conventional techniques to achieve these customizations.
In this first tutorial, we will focus on using a custom data provider to pass custom data to the admin grid. Let’s get started.
Full Video Walkthrough by CodeWithAli
Setting Up the Environment
Official Magento UI Component Documentation
Before diving into the customization, it’s crucial to refer to the official UI component documentation of Magento. This resource is invaluable when customizing UI components.
Magento 2.4.7 Setup
For this tutorial author has used standard Magento 2.4.7 copy set up using the Mark Shust’s Magento Docker repository, which will be used throughout the series.
Creating the Basic Module
Our first task is to create a basic module named Demo_AdminGrids that we will use throughout the series.
Module Initialization
Registration File
Create registration.php file in the root folder. This file is the starting point of our module
<?php

use Magento\Framework\Component\ComponentRegistrar;

ComponentRegistrar::register(ComponentRegistrar::MODULE, 'Demo_AdminGrid', __DIR__);
Module Configuration File
Create an etc. folder inside the root and create a new module.xml inside this folder, this file defines the module and its dependencies.
<?xml version="1.0"?>

<config xmlns:xsi="http://www.w3.org/2001/XMLSchema-instance" xsi:noNamespaceSchemaLocation="urn:magento:framework:Module/etc/module.xsd">
    <module name="Demo_AdminGrid">
        <sequence>
            <module name="Magento_Backend" />
            <module name="Magento_Ui" />
        </sequence>
    </module>
</config>
Running Setup Upgrade
Run the following command to initialize and install the module.
php bin/magento setup:upgrade
Configuring the Module
Adding Menu and ACL
Menu Configuration
To create a menu item in the admin pane, create the menu.xml fine inside etc/adminhtml
<!-- app/code/Demo/AdminGrids/etc/adminhtml/menu.xml -->
<?xml version="1.0"?>
<config xmlns:xsi="http://www.w3.org/2001/XMLSchema-instance" xsi:noNamespaceSchemaLocation="urn:magento:module:Magento_Backend:etc/menu.xsd">
    <menu>
        <add id="Demo_AdminGrid::grids" title="Grids" translate="title" module="Demo_AdminGrid" sortOrder="20" resource="Demo_AdminGrid::grids"/>
        <add id="Demo_AdminGrid::grids_custom_dp" title="Custom Data Provider"
             translate="title" module="Demo_AdminGrid" sortOrder="10" parent="Demo_AdminGrid::grids"
             action="grids/custom/customDataProvider/" resource="Demo_AdminGrid::grids_custom_dp"/>
    </menu>
</config>
ACL Configuration
Create acl.xml file inside “etc/acl.xml which will be used to define access control for the module.
<!-- app/code/Demo/AdminGrids/etc/acl.xml -->
<?xml version="1.0"?>
<config xmlns:xsi="http://www.w3.org/2001/XMLSchema-instance" xsi:noNamespaceSchemaLocation="urn:magento:framework:Acl/etc/acl.xsd">
    <acl>
        <resources>
            <resource id="Magento_Backend::admin">
                <resource id="Demo_AdminGrid::grids" title="Admin Grids" translate="title" sortOrder="30">
                    <resource id="Demo_AdminGrid::grids_custom_dp" title="Custom DataProvider"
                              translate="title" sortOrder="10"/>
                </resource>
            </resource>
        </resources>
    </acl>
</config>
Creating Backend Controller
Routes Configuration
Create the routes.xml file in “etc/adminhtml”. This defines the URL path for the module
<!-- app/code/Demo/AdminGrids/etc/adminhtml/routes.xml -->
<?xml version="1.0"?>
<config xmlns:xsi="http://www.w3.org/2001/XMLSchema-instance" xsi:noNamespaceSchemaLocation="urn:magento:framework:App/etc/routes.xsd">
    <router id="admin">
        <route id="grids" frontName="grids">
            <module name="Demo_AdminGrids" before="Magento_Backend"/>
        </route>
    </router>
</config>
Controller File
Create a controller file inside “Controller\Adminhtml\Custom” name the file as CustomDataProvider.php. This defines the action for the route
<?php

declare(strict_types=1);

namespace Demo\AdminGrid\Controller\Adminhtml\Custom;

use Magento\Backend\App\Action\Context;
use Magento\Backend\App\Action;
use Magento\Framework\View\Result\PageFactory;
use Magento\Framework\View\Result\Page;
use Magento\Framework\App\Action\HttpGetActionInterface;

class CustomDataProvider extends Action implements HttpGetActionInterface
{
    public function __construct(
        Context $context,
        private readonly PageFactory $pageFactory
    ) {
        parent::__construct($context);
    }

    public function execute(): Page
    {
        $resultPage = $this->pageFactory->create();
        $resultPage->setActiveMenu('Demo_AdminGrid::grids');
        $resultPage->addBreadcrumb(__('Grids'), __('Grids'));
        $resultPage->addBreadcrumb(__('Custom'), __('Custom'));
        $resultPage->getConfig()->getTitle()->prepend(__('Custom Data Provider'));
        return $resultPage;
    }
}
Creating UI Component
Layout Configuration
Layout File
The layout file defines the structure of the page. Create a grids_custom_customdataprovider.xml file inside “view\adminhtml\layout”
<?xml version="1.0"?>
<page xmlns:xsi="http://www.w3.org/2001/XMLSchema-instance"
      xsi:noNamespaceSchemaLocation="urn:magento:framework:View/Layout/etc/page_configuration.xsd">
    <body>
        <referenceContainer name="content">
            <uiComponent name="grids_custom_customdataprovider_list" />
        </referenceContainer>
    </body>
</page>
UI Component Configuration
The ui_component file configures the UI component, create a grids_custom_customdataprovider_list.xml inside view\adminhtml\ui_component
<?xml version="1.0" encoding="UTF-8"?>
<listing xmlns:xsi="http://www.w3.org/2001/XMLSchema-instance"
         xsi:noNamespaceSchemaLocation="urn:magento:module:Magento_Ui:etc/ui_configuration.xsd">
    <argument name="data" xsi:type="array">
        <item name="js_config" xsi:type="array">
            <item name="provider" xsi:type="string">
                grids_custom_customdataprovider_list.grids_custom_customdataprovider_list_data_source
            </item>
            <item name="deps" xsi:type="string">
                grids_custom_customdataprovider_list.grids_custom_customdataprovider_list_data_source
            </item>
        </item>
        <item name="spinner" xsi:type="string">grids_custom_customdataprovider_columns</item>
    </argument>
    <dataSource name="grids_custom_customdataprovider_list_data_source" component="Magento_Ui/js/grid/provider">
        <settings>
            <storageConfig>
                <param name="indexField" xsi:type="string">id</param>
            </storageConfig>
            <updateUrl path="mui/index/render"/>
        </settings>
        <aclResource>Demo_AdminGrid::grids_custom_dp</aclResource>
        <dataProvider class="Demo\AdminGrid\Ui\Component\DataProvider\Custom" name="grids_custom_customdataprovider_list_data_source">
            <settings>
                <requestFieldName>id</requestFieldName>
                <primaryFieldName>id</primaryFieldName>
            </settings>
        </dataProvider>
    </dataSource>
    <listingToolbar name="listing_top">
        <settings>
            <sticky>true</sticky>
        </settings>
        <bookmark name="bookmarks"/>
        <columnsControls name="columns_controls"/>
        <filters name="listing_filters" />
        <paging name="listing_paging"/>
    </listingToolbar>
    <columns name="grids_custom_customdataprovider_columns">
        <column name="id">
            <settings>
                <label translate="true">ID</label>
                <sortable>false</sortable>
            </settings>
        </column>
        <column name="name">
            <settings>
                <label translate="true">Name</label>
                <filter>text</filter>
                <dataType>text</dataType>
            </settings>
        </column>
        <column name="company">
            <settings>
                <label translate="true">Company</label>
                <filter>textRange</filter>
                <sortable>false</sortable>
            </settings>
        </column>
        <column name="city">
            <settings>
                <label translate="true">City</label>
                <sortable>false</sortable>
            </settings>
        </column>
    </columns>
</listing>
Custom Data Provider

Data Provider Class
The custom data provider class fetches and processes the data .Create custom.php inside “Ui\Component\DataProvider”
<?php

declare(strict_types=1);

namespace Demo\AdminGrid\Ui\Component\DataProvider;

use Magento\Framework\App\RequestInterface;
use Magento\Framework\View\Element\UiComponent\DataProvider\DataProvider as UiDataProvider;
use Magento\Framework\Api\Search\SearchCriteriaBuilder;
use Magento\Framework\Api\FilterBuilder;
use Magento\Framework\Api\Search\ReportingInterface;
use Magento\Framework\Exception\LocalizedException;

class Custom extends UiDataProvider
{
    /**
     * @var SearchCriteriaBuilder
     */
    protected $searchCriteriaBuilder;

    /**
     * @var FilterBuilder
     */
    protected $filterBuilder;

    /**
     * @var ReportingInterface
     */
    protected $reporting;
    protected $meta = [];
    protected $data = [];

    /**
     * @param array<int, array<int, string>> $meta
     * @param array<int, array<int, string>> $data
     * @SuppressWarnings(PHPMD.ExcessiveParameterList)
     */
    public function __construct(
        string $name,
        string $primaryFieldName,
        string $requestFieldName,
        ReportingInterface $reporting,
        SearchCriteriaBuilder $searchCriteriaBuilder,
        RequestInterface $request,
        FilterBuilder $filterBuilder,
        array $meta = [],
        array $data = []
    ) {
        $this->searchCriteriaBuilder = $searchCriteriaBuilder;
        $this->filterBuilder = $filterBuilder;
        parent::__construct(
            $name,
            $primaryFieldName,
            $requestFieldName,
            $reporting,
            $searchCriteriaBuilder,
            $request,
            $filterBuilder,
            $meta,
            $data
        );
    }

    public function getData(): array
    {
        try {
            $searchCriteria = $this->searchCriteriaBuilder->create();
            $items = [
                ['id' => '1', 'name' => 'John', 'company' => 'Google', 'city' => 'New York'],
                ['id' => '2', 'name' => 'David', 'company' => 'Microsoft', 'city' => 'Berlin'],
                ['id' => '3', 'name' => 'Ali', 'company' => 'Azguards', 'city' => 'New Delhi'],
                ['id' => '4', 'name' => 'Raj', 'company' => 'Delta', 'city' => 'Banglore'],
            ];
            return [
                'totalRecords' => 4,
                'items' => $items,
            ];
        } catch (LocalizedException $e) {
            return [
                'items' => [],
                'error' => 'Server Error: Please contact the administrator if it persists !!',
            ];
        }
    }
}
In this tutorial, we created a basic Magento 2 module and configured it to use a custom data provider for an admin grid. We covered the essential files and configurations needed to get a custom admin grid up and running. Stay tuned for the next tutorial where we will dive deeper into customizing the filters and data processing in the grid.
Would you like to integrate Whatsapp or APIs into your website or mobile app?
Feel Free To Contact Our Experts
Would you like to share this article?
Share
Related work

Commerce
Jackie's WorkStyles
A uniform store where embroidery is part of the product, not an add-on
2,062 colour and size variants imported from supplier data
A WooCommerce uniform store with automated supplier imports and embroidery priced into every variant.

Commerce
Sip and Throw
Experiential Hospitality & Franchise Commerce, Connecting Digital Storytelling with Operations
< 80 ms edge
An omnichannel hospitality platform combining high-speed headless booking, Stripe Accounts v2 franchise economics, and an iPad studio console for Friday night peak operations.

Commerce
Avenue Coral Gables
A headless booking platform for a luxury hotel, built around the limits of its PMS
Headless.
A headless Next.js booking experience that keeps pricing, inventory and payments in sync with Cloudbeds.
Related insights

7 Magento Design Patterns That Actually Scale
Prevent Magento technical debt with these 7 performance best practices. Learn how to optimize for scale before issues arise.

Agentic AI in Retail: What to Expect in the Next Few Years
Explore the impact of agentic AI in retail over the next three years, focusing on operational shifts and necessary foundational technologies.

Digitize Retail Operations: From Paper to Platform
Learn how digitizing retail operations can eliminate manual errors, reduce shrink, and improve efficiency. Discover a seamless path from paper to platform.